
jupyter server password우분투 서버(22.04)에 Jupyter Notebook을 설치하는 방법을 단계별로 설치해보기
서버의 도커 컨테이너를 생성하고 도커 컨테이너안에서 설치를 기준으로 작성
https://coffee926.tistory.com/70
리눅스 서버에서 한줄로 도커 설치하기
apt-get update && \apt-get install apt-transport-https ca-certificates curl software-properties-common && \curl -fsSL https://download.docker.com/linux/ubuntu/gpg | sudo apt-key add - && \add-apt-repository "deb [arch=amd64] https://download.docker.com/lin
coffee926.tistory.com
도커 설치는 한줄로 여기서 참고
1. 파이썬 등 필수 패키지 일괄 설치
apt update -y && apt upgrade -y && \
apt install python3 python3-pip -y && \
pip3 install jupyter && \
jupyter --version2. 기본 설정
jupyter notebook --generate-config
# /root/.jupyter/jupyter_notebook_config.py 에 생성
# 파일 내용
c = get_config()
# 포트 설정 (필요에 따라 변경 가능)
c.NotebookApp.port = 8888
# 모든 IP 주소에서 접근 가능하도록 설정
c.NotebookApp.ip = '0.0.0.0'
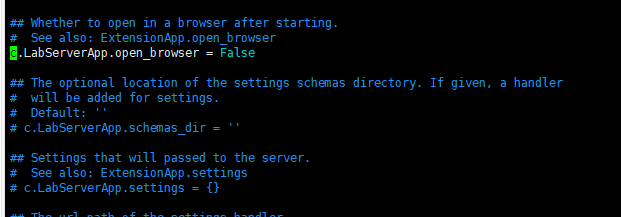
# 서버 실행 중에 터미널에 자동으로 노트북 열지 않도록 설정
c.NotebookApp.open_browser = False
# 비밀번호 설정
from notebook.auth import passwd
c.NotebookApp.password = passwd('YOUR_PASSWORD')파일을 열어 다음 내용을 수정합니다.

이후 패스워드를 설정한다

이렇게 설정 후 시작하면 짠 ~
jupyter notebook --allow-root

# http://[ip 주소]:[포트] 접근시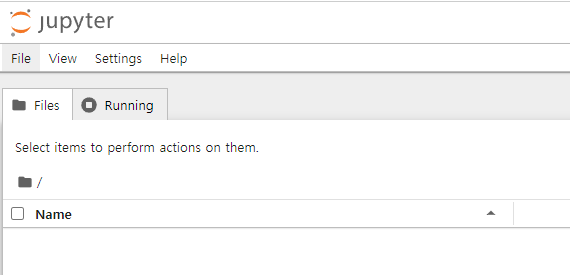
짜잔~ 이렇게 접근 가능

chatgpt4o 의 도움을 받아 작성되었습니다
PS. 추가 팁, 매번 실행하는 것은 귀찮으니
#!/bin/bash
# /etc/init.d/jupyter

start() {
  if [ -f /tmp/jupyter.pid ]; then
    status
  else
    nohup /usr/local/bin/jupyter notebook --allow-root 2>&1 &
    echo $! > /tmp/jupyter.pid && cat /tmp/jupyter.pid
    echo -e "\033[0m"
  fi
}

stop() {
  if [ -f /tmp/jupyter.pid ]; then
    /usr/bin/kill -9 $(cat /tmp/jupyter.pid)
    echo -e "\033[0;31mnow stopped"
  else
    echo -e "\033[0;31malready stopped"
  fi
  echo -e "\033[0m"
  rm -f /tmp/jupyter.pid
}

status() {
  if ps -p $(cat /tmp/jupyter.pid) > /dev/null
  then
    echo -e "\033[0;32mjupyter is running"
  else
    echo -e "\033[0;31mjupyter is not running"
  fi
  echo -e "\033[0m"
}

restart() {
  stop
  start
}

case "$1" in
  start)
    start
    ;;
  stop)
    stop
    ;;
  restart)
    restart
    ;;
  status)
    status
    ;;
  *)
    echo $"Usage: $0 {start|stop|restart|status}"
    exit 1
esac이렇게 서비스로 등록하는 것도 하나의 좋은 방법~~~

'Tool > Docker' 카테고리의 다른 글
| 리눅스 서버에서 한줄로 도커 설치하기 (0) | 2024.06.01 |
|---|---|
| python 3.10 install on ubuntu 22.04 (1) | 2024.05.02 |
| Fix 'add-apt-repository command not found' Error on Ubuntu and Debian (0) | 2024.05.01 |
| 도커로 DNAT 자동화 (0) | 2024.04.10 |
| 매번 까먹는 도커 이미지 백업 및 복구 (0) | 2024.04.07 |